
Reading Handwritten User choice with OCR (Optical Character Recognition):
Guyz,
In a day to day programming activities, you might have come across a requirement, where you must read the hand-written user choice in a form as shown in Fig 1,2,3 and 4.
The user selects his choice by marking or blurring his options with a pen, pencil, sketch or marker, and you cannot control thousands of users to have a unique way of input or unique marking tool.
Fig: Reading with OCR

Fig 1:

Fig 2: TAG Inspection for SITE XYZ 003AC Project:

Fig 3: FIRE & SAFETY CHECKLIST BUILDING#002 STREET 22:
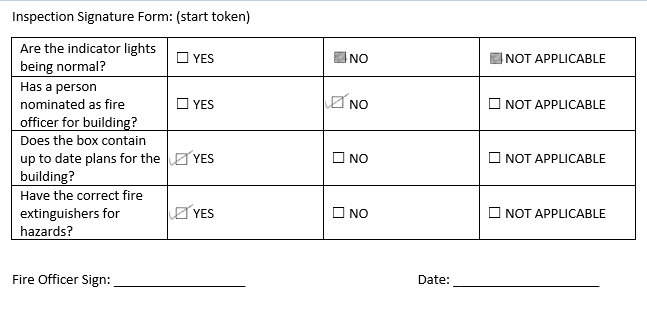
Fig 4: SAMPLE APPROVAL FORM FOR ABC ACTIVITY:

How to achieve this in C#?

The above flow diagram explains the complete steps to implement this requirement. Firstly, the scanned document containing user-entered choices is uploaded to the application, which is converted to image format and read using Microsoft office document imaging library.
You can find this DLL in Add Reference è COM components. If you can’t see it, you can download here.
After getting the OCR output, our internal logic is used to predict the exact user’s choice.
Let’s consider the scanned form in Fig 4, we will read it with OCR.
To Start, including the special libraries as below.
Step 1:
using iTextSharp.text.pdf;
using iTextSharp.text.pdf.parser; // Used to convert the scanned PDF to JPEG Image
using MODI; // Used to Read the Image with OCR
Step 2:
The below method is to extract the image from a scanned document.
/// <summary>Extracts all images (of types that iTextSharp knows how to decode) from a PDF file.</summary>
public static Dictionary<string, System.Drawing.Image> ExtractImages(string filename)
{
try
{
var images = new Dictionary<string, System.Drawing.Image>();
using (var reader = new PdfReader(filename))
{
var parser = new PdfReaderContentParser(reader);
ImageRenderListener listener = null;
for (var i = 1; i <= reader.NumberOfPages; i++)
{
parser.ProcessContent(i, (listener = new ImageRenderListener()));
var index = 1;
if (listener.Images.Count > 0)
{
Console.WriteLine("Found {0} images on page {1}.",
listener.Images.Count, i);
foreach (var pair in listener.Images)
{
images.Add(string.Format("{0}_Page_{1}_Image_{2}{3}",
Path.GetFileNameWithoutExtension(filename),
i.ToString("D4"), index.ToString("D4"), pair.Value), pair.Key);
index++;
}
}
}
return images;
}
}
catch {
Console.WriteLine("Cant read file :"+ filename);
return "";
}
}
** Note the scanned PDF will always have an image result, the above method is to extract images from the scanned PDF document.
If you already have an Image file, then skip the above Step.
Step 3:
After getting the Image file, let's read it with our Microsoft Document Imaging library as shown:
private static string ExtractTextFromImage(string imagePath)
{
Document modiDocument = new Document();
modiDocument.Create(imagePath);
modiDocument.OCR(MiLANGUAGES.miLANG_ENGLISH);
MODI.Image modiImage = (modiDocument.Images[0] as MODI.Image);
string extractedText = modiImage.Layout.Text;
modiDocument.Close();
return extractedText;
}
For Fig 4 it returned the result as:

Step 4:
I have written a small logic to extract a portion of text. You can use it by defining start text and end text in the start_token , end_token variables, which gives you the entire text in-between. However, If you want to process the entire text, then keep these variables empty.
/*Start Custom Logic to read between start and end token*/
string start_token = "";
string end_token = "";
string result = "";
if (!string.IsNullOrEmpty(start_token) && (!string.IsNullOrEmpty(end_token))
if (!string.IsNullOrEmpty(start_token) && (!string.IsNullOrEmpty(end_token))
{
String line;
String text = extractText;
StringReader reader = new StringReader(text);
while (!(line = reader.ReadLine()).Equals(start_token))
{
//ignore
}
while (!(line = reader.ReadLine()).StartsWith(end_token))
{
result += line;
}
}
else
{
result = extractText;
}
Step 5:
Now, let’s write the logic to detect what is the user choice. For reading SUBCONTRACTOR choice, in the below code we are getting the options between SUBCONTRACTOR & CONTRACTOR text, and processing it with CheckForTickMark method for APPROVE/REJECT.
string subconSign = Between(result, "SUBCONTRACTOR", "CONTRACTOR");
string subconApprove = Before(subconSign, "APPROVE", 1);
Console.WriteLine("Subcontractor : Approve:"
+ CheckForTickMark(subconApprove));
string subconReject = Before(subconSign, "REJECT", 2);
Console.WriteLine("Subcontractor : Reject:"
+ CheckForTickMark(subconReject));
/// Repeat the same for other options
/// Method containing Internal Logic to Detect User Choice
public static string CheckForTickMark(string a)
{
if (string.IsNullOrEmpty(a))
return "Ticked";
if (a.Equals("na"))
return "Ticked";
a = a.Replace("\r","").Replace("\n", "").Replace(" ", "");
if (string.IsNullOrEmpty(a))
return "Ticked";
else if (a.Equals("D") || a.ToUpper().Equals("E") ||
a.ToUpper().Equals("L") || a.ToUpper().Equals("EI")
|| a.ToUpper().Equals("EL") || a.ToUpper().Equals("FL")
|| a.ToUpper().Equals("FI") || a.ToUpper().Equals("LI")
|| a.ToUpper().Equals("D!") || a.Equals("LI") ||
a.ToUpper().Equals("DI") || a.ToUpper().Equals("D|")
|| a.ToUpper().Equals("E|")
|| a.ToUpper().Equals("L|") || a.ToUpper().Equals("VE")
|| a.ToUpper().Equals("''") || a.Equals("'")
|| a.Equals("0") || a.ToUpper().Equals("O"))
{ return "NotTicked"; }
return "Ticked";
}
Result:

My logic for detecting the user choice is I will compare the checkbox interpreted text with few standard OCR outputs for a checkbox which are nothing but characters [LI, EI, E, DI..etc], if my OCR library gives checkbox interpretation other than the defined standard characters then it means that something happened here i.e it is Ticked.
To increase the accuracy, I have collected different format user inputs through pen, pencil, sketch, and marker to tune up exact perdition in CheckForTickMark method. The application is tested with different inputs giving 99% perfect results.
To increase the accuracy, I have collected different format user inputs through pen, pencil, sketch, and marker to tune up exact perdition in CheckForTickMark method. The application is tested with different inputs giving 99% perfect results.
However, to increase more accuracy and to prevent any distortion, I would suggest you to impose a few limitations as a NOTE:
- Selection of user choice (checkbox) should be a tick mark with Pen or Pencil.
- Form columns/row lines should not be disturbed while marking.
Hope you enjoyed. Drop your query’s/comments in the box to answer.
1 comment:
Very useful article Ilyas ! Thanks for your outstanding effort:)
Post a Comment